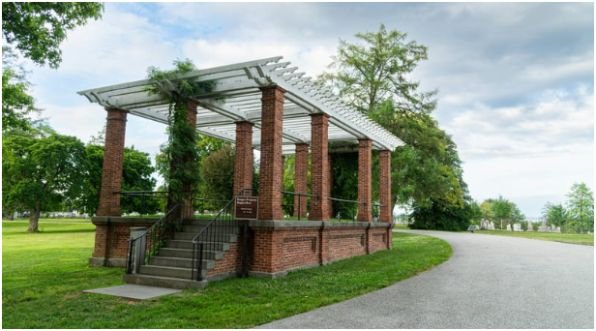
If you’ve ever daydreamed about sipping a cold drink under a beautiful, shady spot in your yard, chances are you’ve thought about building a pergola. I know I have.
When I first started planning mine, I was overwhelmed by the idea. But once I got into the groove of things, I realized that building a pergola is actually a fun and manageable project that anyone can do over a weekend.
Now, I’m here to help you do the same! In this guide, I’ll walk you through how to build a pergola with easy-to-follow steps, and I promise it’ll be more fun than it sounds. Seriously, you’ll feel like a pro when it’s done.
Why Should You Build a Pergola?
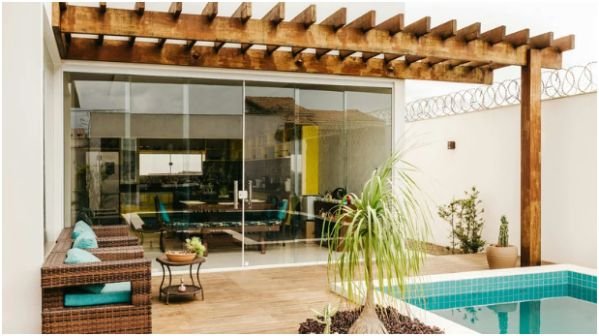
Before we get into the “how,” let’s talk about the “why.” A pergola can be a game-changer for your outdoor space. It’s not just about adding shade—it’s about creating an inviting space that enhances your yard’s beauty and function. You can use it to frame your garden, provide a cozy retreat, or even add a bit of elegance to a patio.
Plus, you don’t need to break the bank or hire an expensive contractor. If you’ve got some basic woodworking skills and a weekend to spare, you can totally do this yourself. Let’s get started!
What Materials Do You Need?
Before you start, you’ll want to gather your materials. I’ve done the legwork for you, so you know exactly what you need:
| Material | Nominal Size | Quantity | Notes |
| Posts | 6x6x8 ft. | 4 | Choose pressure-treated lumber or durable woods like cedar or redwood. |
| Main Beams | 2x10x10 ft. | 4 | These beams will run the 8ft length of the pergola. |
| Top Joists | 2x4x10 ft. | 7 | The rafters will give your pergola its shade and structure. |
| Concrete Mix | 80 lb bags | 4-8 | For securing posts into the ground. |
| Fasteners | 6-inch Structural Lag Screws | ~50 pack | To attach beams to posts and rafters to beams. |
| Fasteners | 4-inch Exterior-grade Deck Screws | 1 lb box | For smaller fixings. |
| Wood Preservative | Cut-end Sealant | 1 can | To treat any exposed cut wood ends to prevent rot. |
How to Build a Pergola: Step-by-Step
Now that we’ve got the materials, it’s time to roll up our sleeves and build this beauty! The process is straightforward, but it’s essential to be methodical. Here’s how to build a pergola from start to finish:
Step 1: Plan and Measure
Before you even pick up your saw, it’s critical to plan. Measure your space, mark out where the posts will go, and ensure everything is level. A good rule of thumb for a standard pergola is 8×8 feet, but you can adjust based on your yard’s size.
Use string lines and a 3-4-5 triangle method to ensure your corners are square. It’s a simple technique that makes a world of difference.
Step 2: Install the Posts
Time to get digging! For each post, dig a hole about 2 feet deep,depending on your local climate and add gravel at the bottom for drainage. If you’re working with soft ground, secure the posts with concrete.
Make sure they’re straight and level using a spirit level, and then brace them while the concrete cures. If you’re placing your pergola on a patio, use post bases that secure the posts to the concrete with anchors.
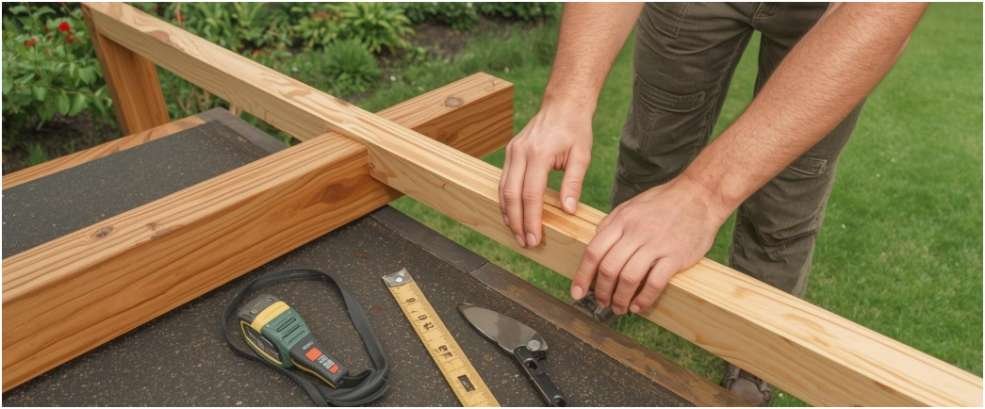
Step 3: Attach the Main Beams
Once your posts are securely in place, it’s time to attach the main beams. Cut four 2×10 boards to 10 feet, ensuring you have a one-foot overhang on each side.
Clamp them to the posts, checking for level, and then drill pilot holes to attach them with lag screws. This step ensures the pergola is structurally solid and won’t wobble.
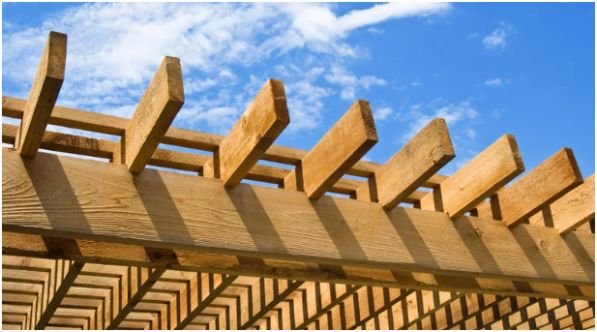
Step 4: Install the Rafters
Now, it’s time to lay down your top joists. Measure the spacing between them, usually 12-16 inches apart, then place the joists across the main beams. Use a scrap piece of wood as a spacer to keep the gaps even. Secure each joist with screws or brackets.
For added aesthetic and shade, you can install purlins, smaller slats, on top of the rafters, perpendicular to them. This extra layer adds charm and more coverage.
Step 5: Add the Finishing Touches
To really make your pergola pop, consider adding decorative cuts to the ends of the beams and rafters. Curves or angles can give it a custom, high-end look.
Don’t forget to treat the cut ends of the wood with a wood preservative to prevent rot. Finally, add corner braces for extra support, and maybe even add some climbing plants, string lights, or curtains to make the space feel even more inviting.
Pergola Care: Keeping It Beautiful
Once your pergola is complete, maintenance is key. Even durable materials like cedar need regular cleaning, inspections, and reapplication of sealants to keep them looking great.
Check for signs of rot, especially after heavy rains, and make repairs promptly. This will ensure your pergola stands the test of time.
FAQ: All Your Pergola Questions Answered
1. How long does it take to build a pergola?
Building a pergola typically takes about 1-2 weekends, depending on the size and complexity of your design. If you have a helper and the weather is good, it’s completely doable in a weekend!
2. Can I build a pergola by myself?
It’s definitely possible, but I recommend having at least one other person to help with lifting the posts and beams. It makes the job much easier and safer.
3. What materials should I use for the pergola posts?
For durability and longevity, go with pressure-treated lumber, cedar, or redwood. These materials are resistant to rot and weathering, ensuring your pergola stands the test of time.
4. Can I add a roof to my pergola?
Absolutely! You can add a polycarbonate roof, fabric shade cloth, or even vines and climbing plants to provide more shelter and shade. It’s all about how you want to use the space.
Perfection, Delivered
Building a pergola isn’t just about putting wood together—it’s about creating a space where memories are made.
Whether it’s hosting friends for a barbecue or enjoying a quiet afternoon with a good book, your new pergola will become the heart of your outdoor space.
So, grab your tools, make a plan, and get building. You’ve got this, and the results will be more than worth it. Happy building!