I still remember the night I discovered how to fix a leaky faucet—not because I suddenly became a home-repair wizard, but because that steady drip… drip… drip kept me awake like a very boring water-themed alarm clock. Instead of calling a plumber at midnight, I rolled up my sleeves and gave it a try myself.
To my surprise, the repair felt less like a construction project and more like following a simple routine once I knew what part had worn out. If you’ve ever felt the same frustration, I promise you’ll feel empowered by the end of this guide.
Why Does a Faucet Even Start Dripping?
When I first noticed the leak, I assumed the entire faucet needed replacing. Turns out, faucets usually drip because of small worn-out parts inside.
A washer flattens, an O-ring cracks, or a cartridge gets tired after years of turning the water on and off. Once you recognize this, the repair process feels much less intimidating.
Different faucet types rely on different components. A compression faucet uses rubber washers, so it leaks when the washer stops creating a tight seal.
Cartridge and ball faucets often leak because their O-rings wear down or the cartridge gets stuck or damaged. Even a leak around the base usually means the O-rings under the spout need fresh replacements.
Knowing where the drip is coming from tells you exactly what to fix—and gives you a quick confidence boost before you touch a single tool.
What Tools Do You Need for How To Fix a Leaky Faucet?

Before I ever attempted my first repair, I used to imagine complicated equipment involved in plumbing. The reality feels refreshingly simple. You probably have most of these tools in your home already.
You’ll need an adjustable wrench or channel locks, a flat-head and Phillips screwdriver, and possibly an Allen wrench. You also need a replacement washer, O-ring, or cartridge depending on your faucet. I always keep plumber’s grease, Teflon tape, and a towel within reach because they make the process cleaner, smoother, and much easier.
When everything is laid out, the project feels calm and organized—like prepping your kitchen counter before cooking.
How Do You Know Which Part Is Actually Causing the Leak?
This step feels crucial because guessing leads nowhere. I start by simply observing the leak. If water drips straight from the spout even when the faucet is off, the washer or cartridge likely needs replacing.
If water pools around the base of the handle, the O-rings have probably worn out. When water leaks from under the sink, the mounting nuts might be loose or the supply lines might need attention.
Taking a moment to correctly identify the leak saves you from taking apart unnecessary parts or buying replacements you don’t need. Once you identify the issue, the fix becomes almost automatic.
How To Fix a Leaky Faucet Step by Step (Without Stressing Out)

Here’s the practical, real-world guide I follow every time. No fancy jargon—just clear steps that make the project feel approachable.
Step 1: Turn Off the Water
Reach under the sink and twist the hot and cold valves clockwise. If your home doesn’t have individual shut-offs, turn off the main water supply. Open the faucet afterward to drain any leftover water. This always feels like the “deep breath” before the repair begins.
Step 2: Prep the Sink Area
I place a towel in the basin to stop screws from disappearing down the drain. If your faucet has a shiny finish, a quick wrap of masking tape around delicate areas protects it from accidental scratches. Simple step, big reward.
Step 3: Remove the Handle
Use a flat-head screwdriver to pry off the decorative cap, revealing the hidden screw. Remove the screw, lift the handle, and set it aside. Some handles use an Allen screw, so check yours before forcing anything.
Step 4: Access the Internal Parts
A packing nut or bonnet nut holds everything together. Loosen it with your wrench, then lift out the stem or cartridge. Some cartridges have a retaining clip—pliers help remove it safely.
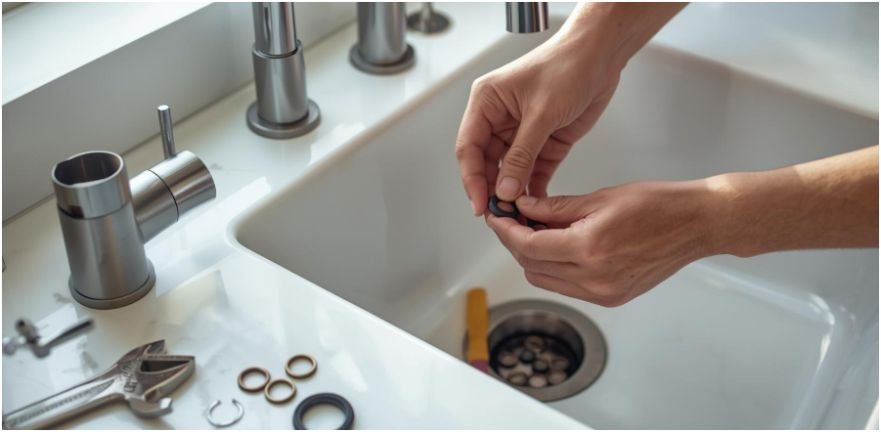
Step 5: Replace the Worn Component
This is where the real fix happens.
For compression faucets:
The washer at the bottom of the stem probably caused the drip. Unscrew the brass screw, remove the old washer, and replace it with an identical one. A dab of plumber’s grease helps create a perfect seal.
For cartridge or ball faucets:
Inspect the O-rings first. If they look cracked or flattened, replace them. If the cartridge looks corroded or worn out, replacing the whole cartridge offers the most reliable fix.
Step 6: Reassemble Everything
Slide the cartridge or stem back in, making sure it lines up perfectly. Tighten the packing nut just enough to secure it. Reattach the handle and decorative cap, and admire your progress.
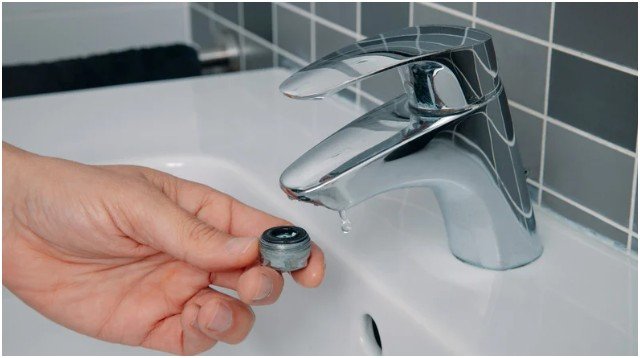
Step 7: Test Your Work
Turn the water valves back on slowly. Run both hot and cold water for a moment, then watch closely for any drips. A successful fix feels instantly rewarding.
If the faucet still leaks, the issue may involve high water pressure or internal piping. That’s a good time to call a professional.
FAQs About How To Fix a Leaky Faucet
1. Why does my faucet drip even after replacing the washer?
If the drip continues, the valve seat may be damaged or the O-ring might need replacing. In some cases, the faucet may use a cartridge, not a washer. When the wrong part gets replaced, the drip remains. A quick check of your faucet type usually clears things up.
2. How do I know if I should replace the whole cartridge?
If you notice corrosion, stiffness, or cracking, replacing the entire cartridge becomes the simplest and most reliable fix. Cartridges wear down over time, especially in areas with hard water. If the faucet feels rough or inconsistent to operate, the cartridge often deserves a fresh start.
3. Can a leaky faucet increase my water bill?
Absolutely. Even a slow drip adds up surprisingly fast. I’ve seen tiny leaks waste gallons of water per day. Fixing the faucet doesn’t just save your sanity—it protects your wallet too.
4. What if the handle leaks instead of the spout?
Handle leaks usually come from worn O-rings. Replacing them often solves the problem instantly. O-rings are inexpensive and surprisingly easy to install once you access the faucet’s interior.
The Drip Stops Here: My Final Word
Fixing a faucet used to feel like a job for someone more qualified than me. Now it feels like another practical life skill I use whenever something starts dripping. Once you break the repair into small steps and understand what’s actually causing the leak, the project becomes unexpectedly empowering.
If you ever feel intimidated, just remember: I learned how to fix a leaky faucet because a midnight drip wouldn’t stop teasing me. You can absolutely learn it too. And trust me—the silence afterward feels like victory.